Tiny Crochet Bee Bracelet Pattern Everyone Will Want This Summer
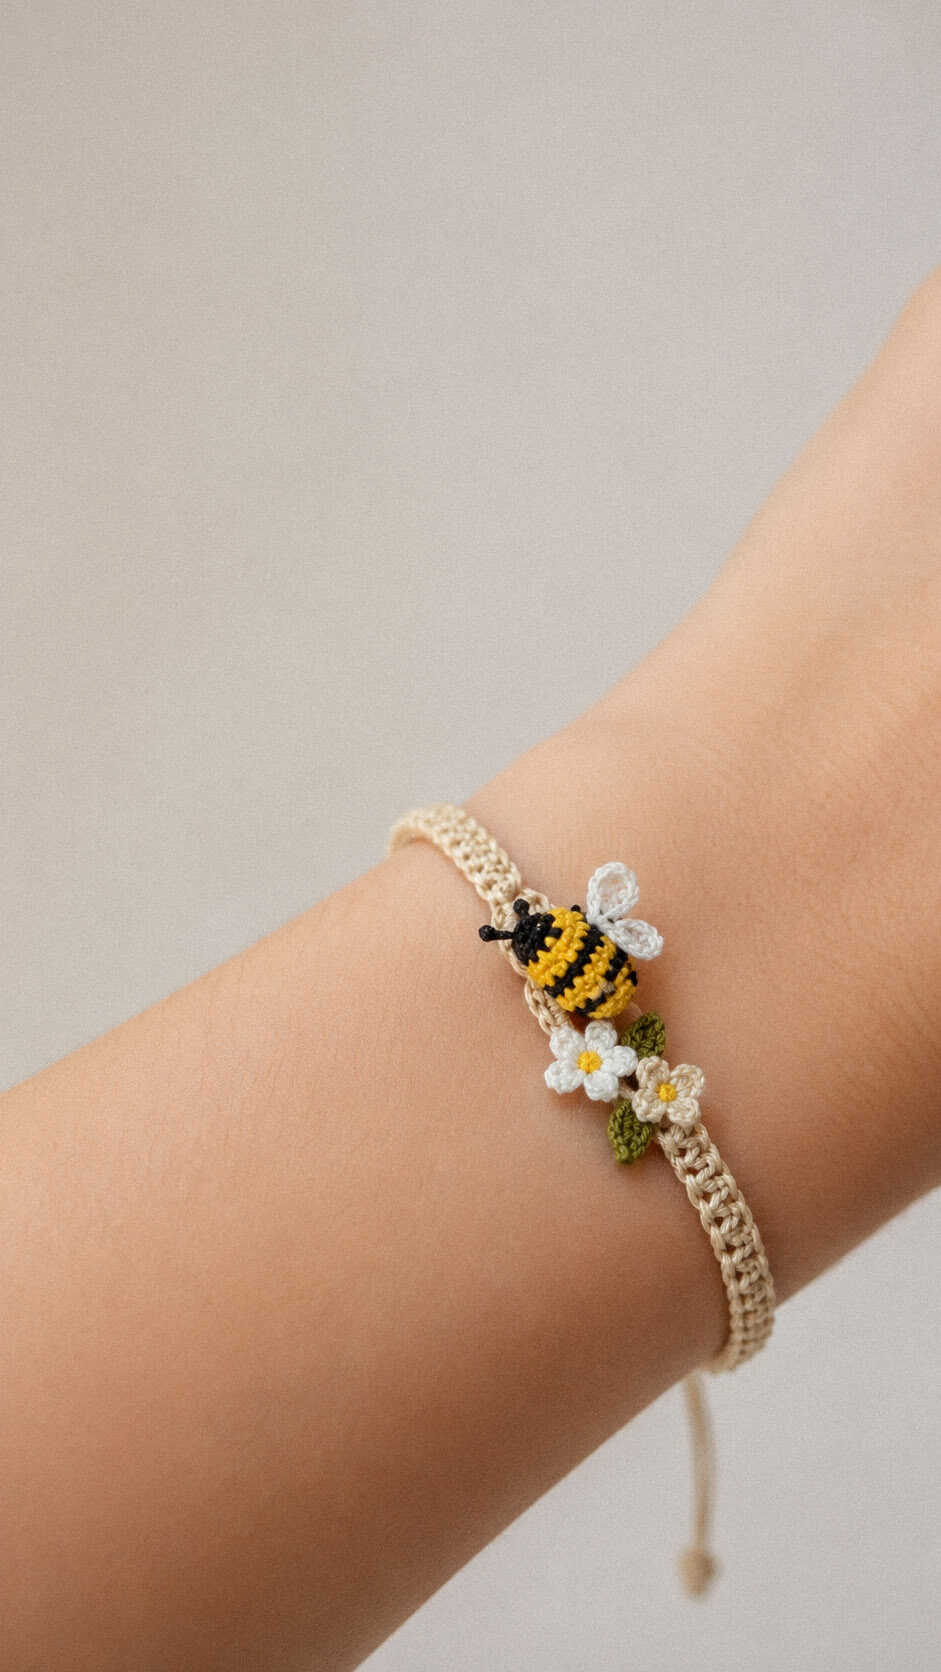
A crochet bee bracelet is a charming handmade accessory that brings together delicate details and wearable crochet style. Featuring a tiny striped bee, soft floral accents, and an adjustable bracelet band, this project is perfect for anyone who loves creating unique handmade jewelry with a playful seasonal touch.
Why This Crochet Bee Bracelet Is So Popular
Small accessories often become favorite projects because they work up quickly and make thoughtful handmade gifts. This bracelet combines a miniature bee, tiny flowers, and soft neutral tones to create a lightweight design that looks beautiful on the wrist while remaining beginner-friendly and enjoyable to crochet.
PATTERN HERE
Crochet Pattern: Tiny Bee Bracelet
Materials
• Fine cotton yarn
‣ Beige
‣ Yellow
‣ Black
‣ White
‣ Soft Green
• Crochet hook 2.00 mm
• Polyester fiberfill
• Yarn needle
• Stitch marker
• Small wooden bead or button
• Scissors
Abbreviations
MR: Magic ring
sc: Single crochet
hdc: Half double crochet
dc: Double crochet
sl st: Slip stitch
ch: Chain
inc: Increase
dec: Decrease
st: Stitch
(…) x n – repeat the instructions in parentheses n times
Bracelet Band
Using beige yarn.
Ch 60
R1: Starting in 2nd ch from hook, sl st in each ch across (59)
Fasten off.
Make a second identical cord.
Place both cords side by side and sew them together through the center 16 stitches only, leaving both ends free for tying and adjustment.
Bee Body
Using yellow yarn.
R1: 6 sc in MR (6)
R2: inc x 6 (12)
R3: (1 sc, inc) x 6 (18)
R4: (2 sc, inc) x 6 (24)
R5: sc around (24)
Change to black.
R6: sc around (24)
Change to yellow.
R7: sc around (24)
Change to black.
R8: sc around (24)
Change to yellow.
R9: sc around (24)
Begin stuffing lightly.
R10: (2 sc, dec) x 6 (18)
R11: (1 sc, dec) x 6 (12)
R12: dec x 6 (6)
Fasten off and close the opening.
Bee Head
Using black yarn.
R1: 6 sc in MR (6)
R2: inc x 6 (12)
R3: (1 sc, inc) x 6 (18)
R4: sc around (18)
R5: sc around (18)
R6: (1 sc, dec) x 6 (12)
Stuff lightly.
R7: dec x 6 (6)
Fasten off leaving a long sewing tail.
Sew to the front of the body.
Bee Wings (Make 2)
Using white yarn.
R1: 6 sc in MR (6)
R2: inc x 6 (12)
R3: (1 sc, inc) x 6 (18)
Finish around edge: (sl st, hdc, dc, hdc, sl st) repeated evenly around.
Fasten off leaving a sewing tail.
Flatten gently.
Antennae (Make 2)
Using black yarn.
Ch 5
R1: Starting in 2nd ch from hook, sl st in next 4 ch
Fasten off leaving a sewing tail.
Small Flower (Make 2)
Using cream yarn.
R1: 5 sc in MR
Petals: (ch 3, sl st into next st) x 5
Fasten off.
Flower Centers (Make 2)
Using yellow yarn.
R1: 6 sc in MR (6)
Fasten off.
Sew to the center of each flower.
Leaf (Make 2)
Using soft green yarn.
Ch 6
Starting in 2nd ch from hook:
sl st, sc, hdc, sc, 3 sc in last ch
Continue on opposite side:
sc, hdc, sc, sl st
Fasten off leaving a sewing tail.
Bracelet Closure Loop
Using beige yarn.
Attach yarn to one bracelet end.
Ch 8
Sl st into the base stitch.
Fasten off.
Bracelet Button
Using beige yarn.
R1: 6 sc in MR (6)
R2: inc x 6 (12)
R3: sc around (12)
R4: dec x 6 (6)
Stuff lightly.
Fasten off.
Sew securely to the opposite bracelet end.
Assembly
Sew the bee body onto the center section where the two bracelet cords are joined.
Sew the head to the front of the body.
Attach the wings slightly overlapping and angled upward.
Sew the antennae between the wings and the head.
Position one flower beside the bee’s head.
Position the second flower near the rear of the bee.
Attach a leaf beneath each flower.
Secure all yarn tails neatly on the underside.
Finishing
Shape the wings gently with your fingers.
Adjust the bracelet length if needed.
The finished bracelet should have a delicate handmade jewelry appearance, with the bee centered on the wrist, soft floral accents on each side, and a slim double-cord bracelet closely matching the proportions shown in the image.